
Shingling a roof can feel like a big job, especially if it’s your first time, but with the right guidance, it’s completely doable. Properly installed shingles protect your home from rain, wind, and sun while giving it a polished, finished look.
In this step-by-step guide for beginners, we’ll cover everything you need to know to shingle a roof safely and effectively.
From gathering the right tools and materials to preparing the roof surface and laying shingles correctly, you’ll learn the essential techniques that make the process smoother and more efficient.
By following these instructions, you can improve your home’s durability and tackle your roofing project with confidence.
Why Shingle Your Roof?
Roof shingles protect your home from rain, wind, sun, and storms. Asphalt shingles, the most common choice for residential roofs, offer good durability, weather resistance, and affordability. Learning how to shingle a roof well extends its life, prevents leaks, and improves your home’s energy efficiency and curb appeal.
Planning Your Roof Shingle Project
Before you begin, planning is critical. Here’s what to consider:
Estimate Materials
Calculate your roof’s square footage to determine how many shingles and underlayment rolls you need. Most asphalt shingles come in bundles, and three bundles usually cover about 100 square feet. Always buy a little extra for mistakes and waste.
Tools & Materials
You’ll need:
- Asphalt shingles
- Roofing nails
- Utility knife
- Chalk line
- Hammer or roofing nailer
- Roofing felt or synthetic underlayment
- Drip edge and starter shingles
- Ladder and safety gear (harness, gloves, glasses)
- Roofing cement and ridge cap shingles
Purchase quality materials rated for your local climate; in Herlingen, strong winds or storms may require more durable products.
Safety First: Roof Work Basics
Roof work is dangerous. Falls are one of the leading causes of construction injuries. Always protect yourself:
Essential safety gear:
- A sturdy ladder
- Safety harness and secure anchor points
- Non‑slip roofing shoes
- Safety glasses and work gloves
Never work on a wet or icy roof. If your roof pitch is steep or the home tall, consider hiring professionals with scaffolding and safety gear.
Step‑By‑Step Roof Shingle Installation
Inspect and Prepare the Roof Deck
Start with a clean roof deck:
- Remove old shingles and underlayment.
- Inspect for soft or rotten plywood and replace any damaged areas.
- Sweep away debris and nails so you have a flat, stable surface.
Install Drip Edge and Underlayment
At the roof edges:
- Install a metal drip edge flashing along the eaves and rakes to guide water into gutters and protect fascia boards.
- Roll out roofing felt or synthetic underlayment horizontally, overlapping each course by a few inches from bottom to top. This creates a moisture barrier beneath the shingles.
Lay Starter Shingles
Starter shingles are the first row along the bottom edge and help seal wind‑driven water:
- Use either pre‑made starter strips or cut the tabs off regular shingles to create a straight starter edge.
- Overlap the drip edge slightly and nail securely.
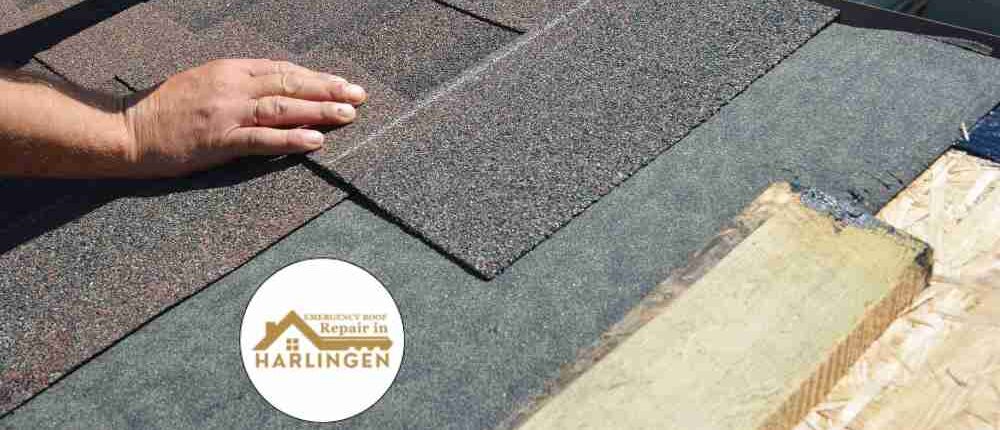
Begin Shingle Installation
Work from the bottom left corner of the roof up and across:
- Snap a chalk line about 5–6 inches up from the roof edge to guide your first full course.
- Lay your first full shingles along the line, nailing each one with 4–6 roofing nails just below the adhesive strip, driven straight and flush.
- Continue across the roof, connecting shingles side‑by‑side.
Stagger and Build Successive Courses
Good water resistance comes from a staggered pattern. Offset each row by cutting a portion off the first shingle so seams don’t line up directly over the row below.
Handle Valleys and Roof Features
Where two roof slopes meet:
- Use a metal valley flashing or open valley configuration to channel water off the roof.
- Flash around chimneys, vents, and skylights with proper metal flashing and sealant.
Ridge Cap Installation
At the top ridge:
- Install ridge cap shingles or cut tabs from regular shingles.
- Overlap each piece by a few inches and nail down to seal the peak.
Finishing Touches and Inspection
After all shingles are in place:
- Cover any exposed nail heads with roofing cement.
- Clean gutters of debris.
- Walk the roof (carefully) to check nailing, alignment, and tight seams.
Common Mistakes to Avoid
Avoid these typical problems:
- Incorrect overhang: Too much or too little overhang can cause wind uplift or water damage to fascia boards.
- Failing to stagger rows: Ridge patterns or seams aligned vertically can increase leaks.
- Poor underlayment or flashing: Skipping or rushing these steps invites water penetration.
Always follow manufacturer guidelines; warranties may be void if you deviate from specified methods.
Professional vs. DIY
DIY shingling can save thousands. However:
- Professional roofers bring expertise on complex roofs and ensure code compliance.
- Roofing contractors often offer warranties on labor and materials.
In Herlingen, consider hiring pros for high slopes, large roof areas, or if you’re uncomfortable with heights.
Maintenance After Installation
A properly shingled roof still needs care:
- Clean gutters and downspouts regularly.
- Inspect shingles for cracks, lifting, or missing nails.
- Watch for moss, algae, or debris buildup.
Routine checks help keep your roof in good shape for decades.
FAQs
How long does it take to shingle a roof on a typical home in Herlingen?
Shingling a typical home roof can take 2–5 days, depending on size, weather, and helpers. A small roof might be done faster, while larger roofs with dormers or complex angles take longer. Weather delays and safety breaks also affect timing.
What’s the best weather condition for installing roof shingles?
Ideal conditions are dry, mild temperatures. Avoid rain or high winds during installation. Hot weather can make shingles soft and harder to handle, while cold weather can make them brittle. Around 40°F–85°F is usually best for asphalt shingles.
Do I need a permit to shingle a roof in Herlingen?
Most municipalities require a building permit or inspection for roof replacements due to structural and safety codes. Contact your local Herlingen building authority before starting to ensure compliance and avoid fines.
Can I use leftover shingles later if I don’t need them all now?
Yes – store leftover shingles in a dry, flat area away from direct sunlight or moisture. They can serve for future repairs or small replacements, helping your roof stay consistent over time.
What’s the difference between architectural and three‑tab shingles?
Three‑tab shingles are lighter and cheaper but less durable. Architectural shingles are thicker with a dimensional look and generally longer lasting. The choice depends on budget, roof slope, and desired lifespan.
Final Thoughts
Shingling a roof may seem challenging at first, but by following the right steps, it becomes a manageable and rewarding project. Proper preparation, careful installation, and attention to detail ensure your roof will protect your home for years to come.
Whether you’re a first-time DIYer or just looking to refresh your skills, understanding how to shingle a roof gives you confidence and control over your home’s maintenance.
With patience and the right approach, you can achieve a strong, durable, and attractive roof that stands up to the elements while enhancing your home’s overall value.